Checking the Abrasive Rate
When WAZER isn’t cutting and it’s NOT an Abrasive Clog.

The Dry Abrasive System manages the garnet as it travels from the hopper all the way to the Cut Head where it is accelerated to do the cutting.
This system does not have many parts, but will need maintenance and contains a few wear components that will need to be replaced when they reach the end of their life. Please contact support@wazer.com for replacements.
When WAZER isn’t cutting and it’s NOT an Abrasive Clog.
An abrasive clog is a blockage at some point in the abrasive stream. The most common area that this occurs in is the abrasive hose.
The end of the Abrasive Hose accumulates silt over time and can result in the clogging of the line, which can ruin your Cut.
This is a quick way to find out if your Abrasive Hopper is clogged and if your Abrasive Valve is operating smoothly.
In addition to the Dry Abrasive Hose, another area that an abrasive blockage can occur is in the Abrasive Hopper and/or mechanism at the bottom.
It is important that the Abrasive Hose End is fully inserted into the Cutting Head. The WAZER sucks up a carefully metered amount of abrasive from the Abrasive Hopper. So, if there is any air leak, the abrasive rate will reduce and the cut performance will be degraded
This guide teaches you how to adjust and reset the abrasive flow rate to maintain best cutting quality.
What to do when your valve won’t open. Sometimes after a severe clog abrasive will find its way into the inner workings of the pinch valve. To fix this requires the disassembly and cleaning of the pinch valve.
This guide will teach you how to replace the worn or damage abrasive hose
How to prime the dry abrasive system before your first cut!
WAZER incorporates a sensor to immediately pause cutting once a backflow is detected, only a small portion of the abrasive system needs to be cleaned afterwards
This guide teaches you how to reset the new Barton Alltek HPA 80 abrasive flow rate to maintain best cutting quality.
[WARNING] WAZER tracks the number of hours it has been running.
Please check the “Total Cut Time“ in the maintenance menu regularly. If you do not abide by the regular maintenance procedures and schedule, the warranty and support for your WAZER will be void.
Before servicing WAZER:
Turn off or close the On/Off Valve or water supply to the machine.
Purge the high-pressure system by properly ending/completing a cut or performing a Nozzle Purge.
Turn off WAZER and disconnect AC power from WAZER and the Pump Box.
Never remove the cover of the Pump Box while it is plugged in.
Setting up WAZER
WAZER is a powerful system; please read, understand, and follow these safety guidelines to avoid damage or injury.
Please follow the provided Maintenance Schedule for your WAZER. If you do not abide to the regular maintenance procedures and schedule, the warranty and support for your WAZER will be void.
An overview of all maintenance & machine procedures you may need to follow in order to properly operate, maintain, or troubleshoot your WAZER.
An overview of the WAZER software WAM. This section contains in-depth guides into the features of WAM as well a instructions to get the most of the WAM software
Like any machine WAZER will occasionally have issues. Explore common problems and their solutions:
A collection of our most useful tips and tricks. We’ve learned a lot about how WAZER works best.
Troubleshooting
This section will help you diagnose problems with your WAZER not turning on, intermittent power, or issues with tripping breakers.
An overview of Control Panel servicing or error messages you may encounter while running your WAZER. This section will help you diagnose the problem when you see an error message.
This section will help you diagnose the problem and point you to solutions for when your WAZER isn’t cutting like you would expect it to.
This section will help you when there are leaks from your machine. How to find the source of the leak and how to either fix or replace the part causing the problem.
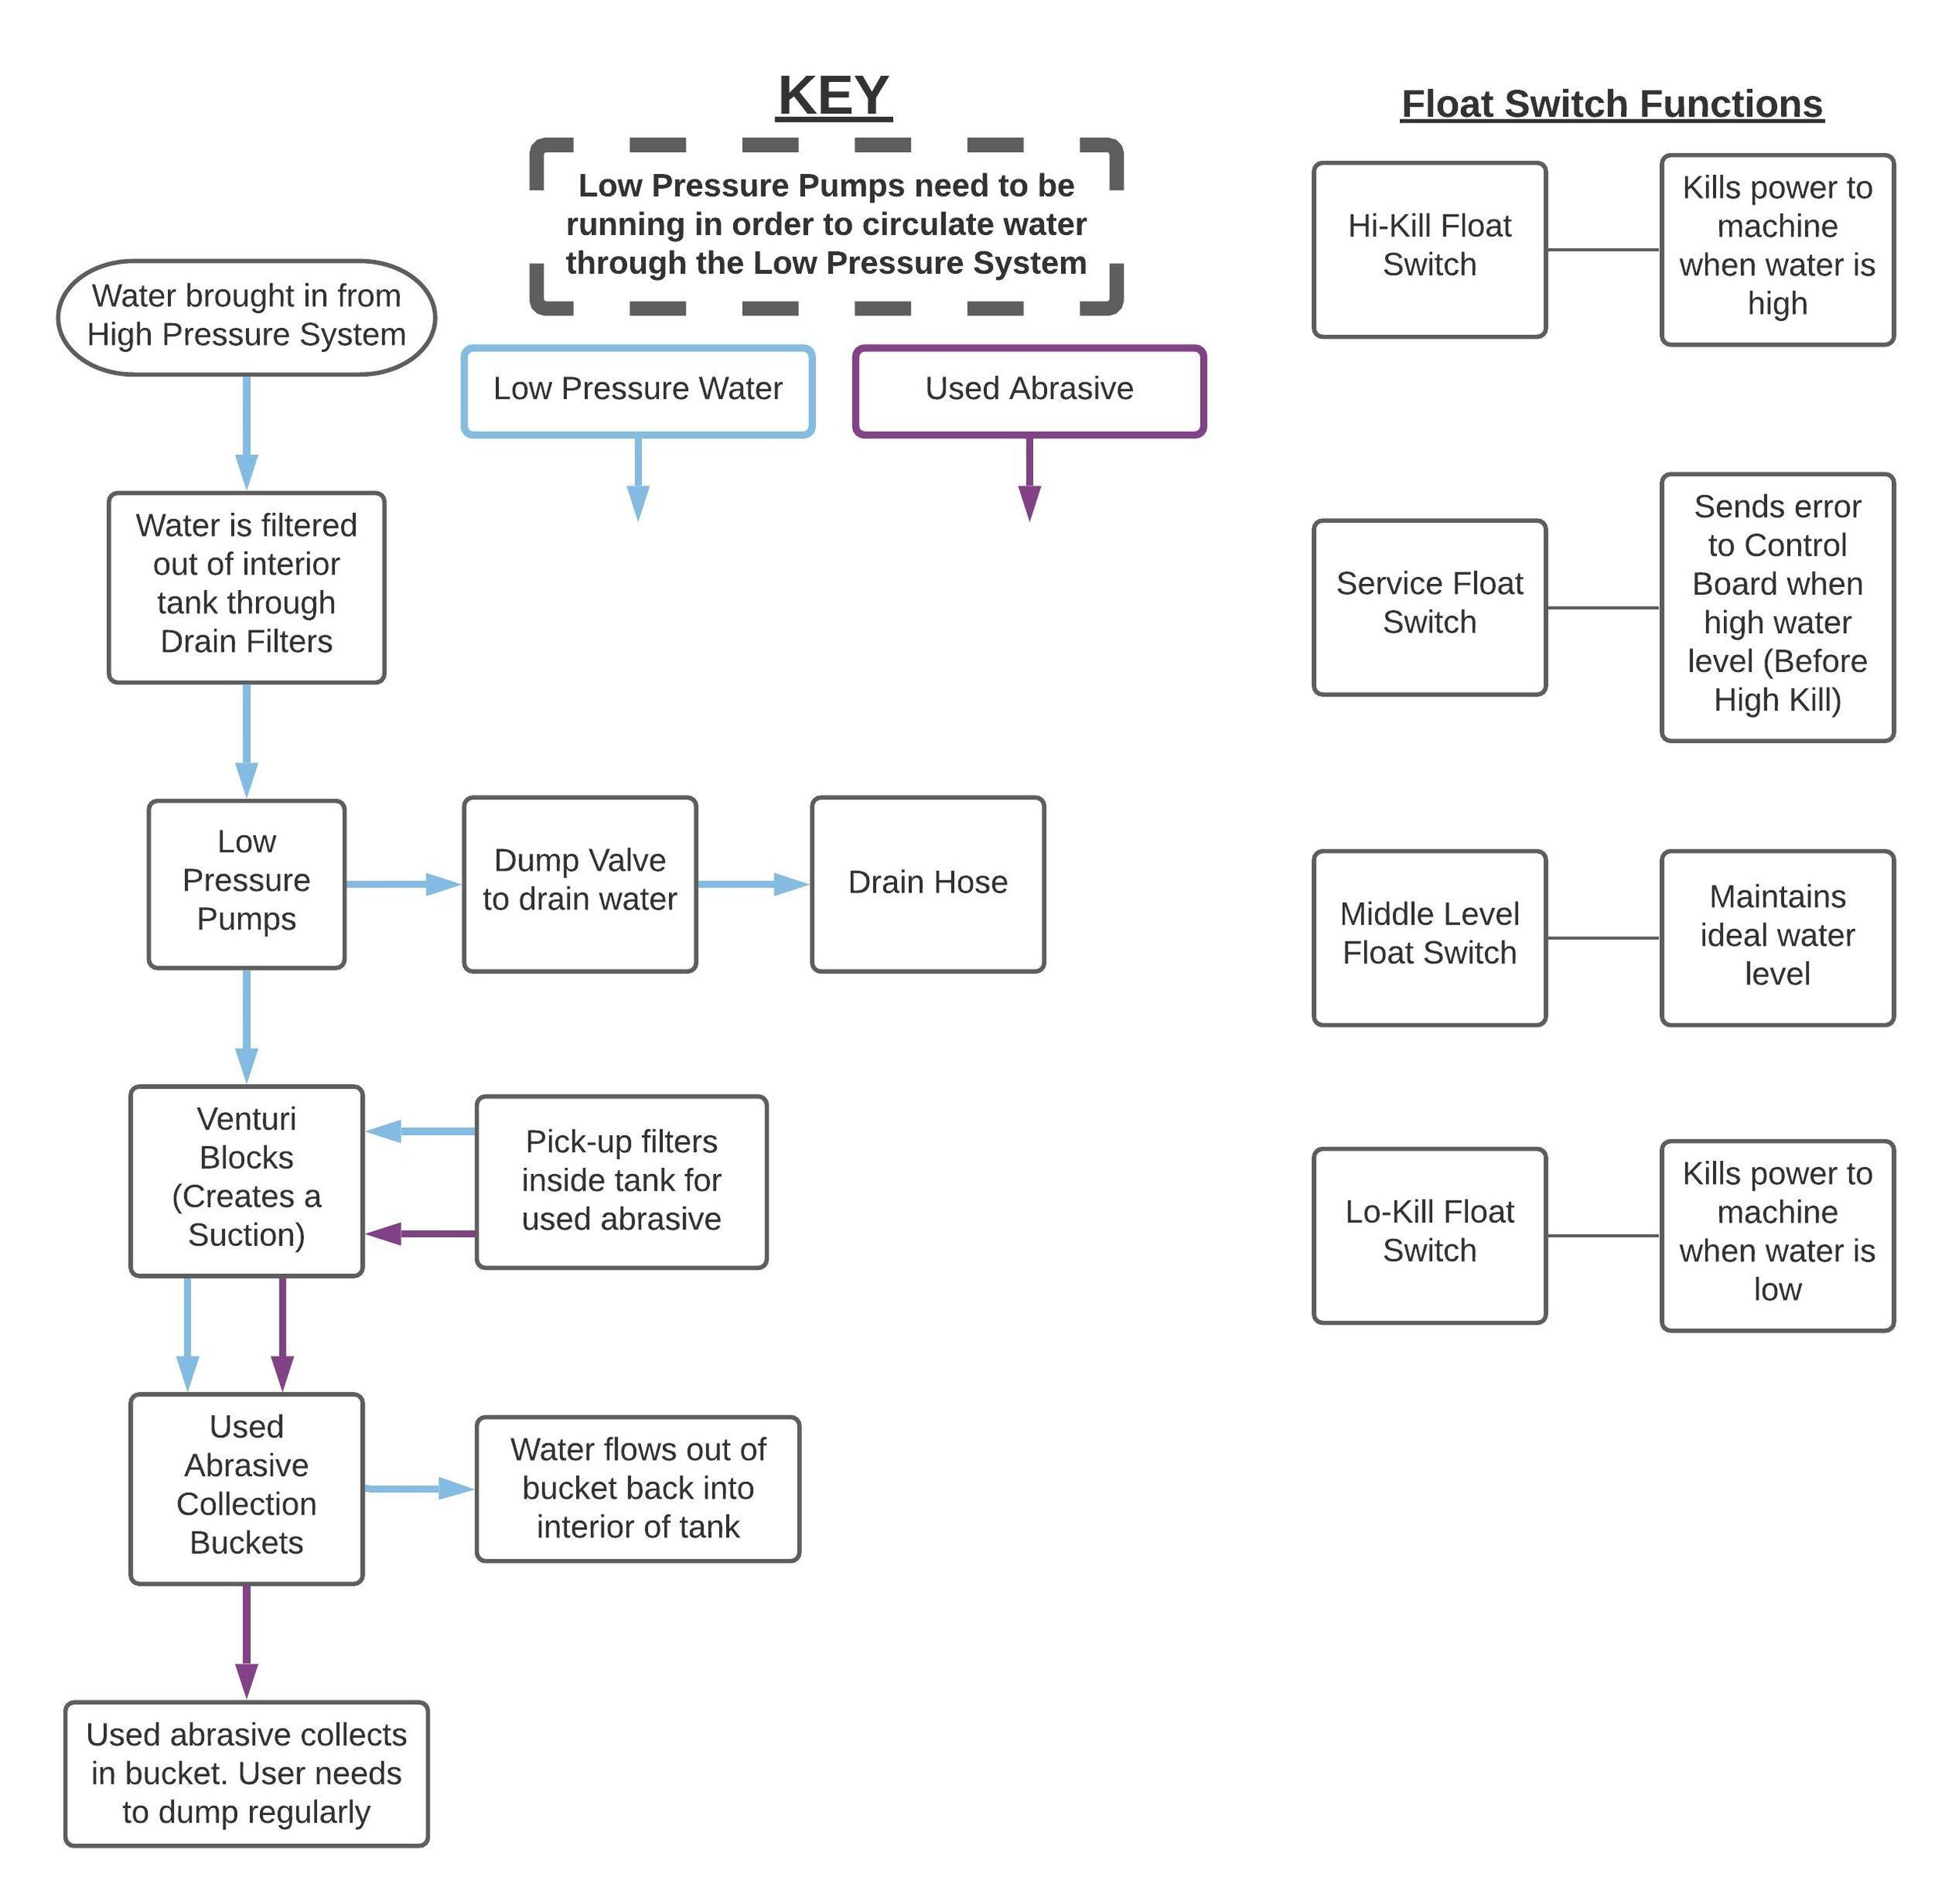
One of the most convenient features of WAZER is that it removes the Used Abrasive from the tank. The system will require some regular maintenance to keep it running smoothly. When things aren’t working as expected this section will help you diagnose what is not working and point you to resources to get things running smoothly.
This section will help identify the root cause of your problem when you notice a problem in the way the Wazer moves the Cutting Head
This section will you to identify the root causes when the water level in the tank is abnormally high or abnormally low. Suggested solutions are also provided.
Tutorials
This articles formalized several term that usually used in a cut project, and also list out all the steps needed from conceptualization to final cut execution.
This tutorial will walk you through converting the edges in an image into vector paths which you can then cut. We use a free Photoshop type program called Gimp to do this. You can accomplish the same process with other software in much the same way.
This is an explanation and dissection of the WAZER G-code structure so that you can understand how WAZER is interpreting the series of commands that WAM generates. These are all critical for your WAZER to function correctly and safely
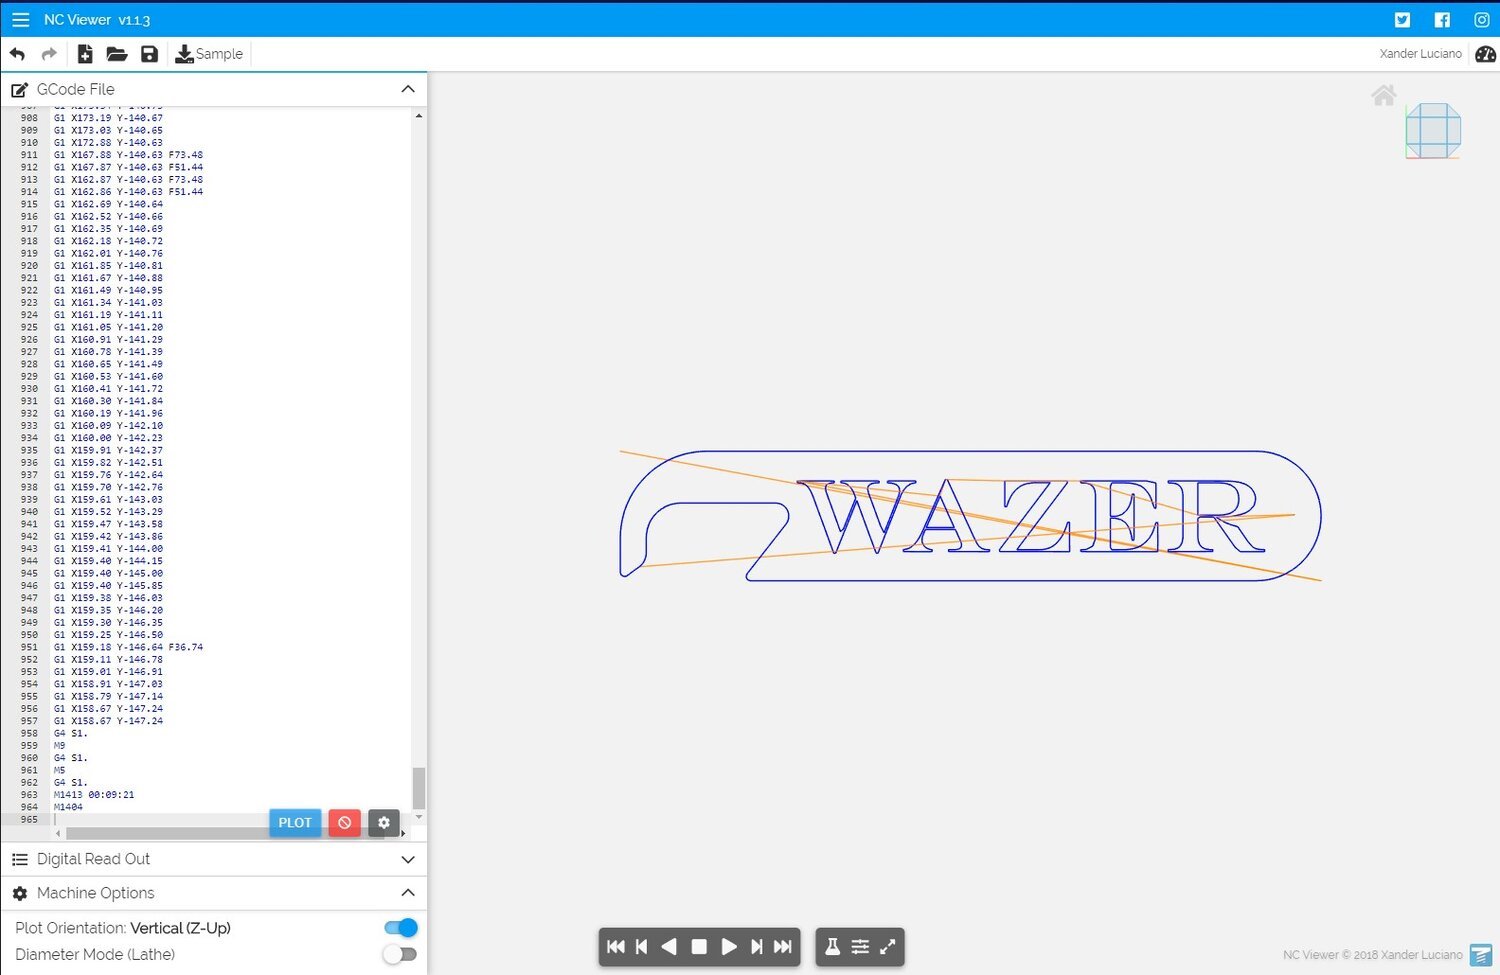
The WAZER team regularly uses this method to see how the material is to be cut by the WAZER. It can help you understand the order parts will be cut out and the path that the machine will take
The WAZER team regularly update this page to reflect the operation procedure of the most commonly used CAD software.
This guide will teach you how to accurately cut internal feature in a stock material that has existing shape you want to keep.