Resetting the Barton Alltek HPA 80 Abrasive Rate
WAZER waterjet cutting performance relies on a consistent abrasive flow rate. While the standard goal rate is 140 +/- 10 g/min, variations in abrasive batches can impact this flow. Recently, the latest batches of Barton Alltek HPA 80A have shown a color shift from light pink to a darker pink or brown. This darker abrasive is denser or has different flow characteristics that can cause a significant drop in flow rate when using standard orifices..
If you notice your abrasive has changed color to a darker pink/brown and your cut quality has decreased, you may need to switch to the "SH" (Super High) Abrasive Orifice.
Tools needed
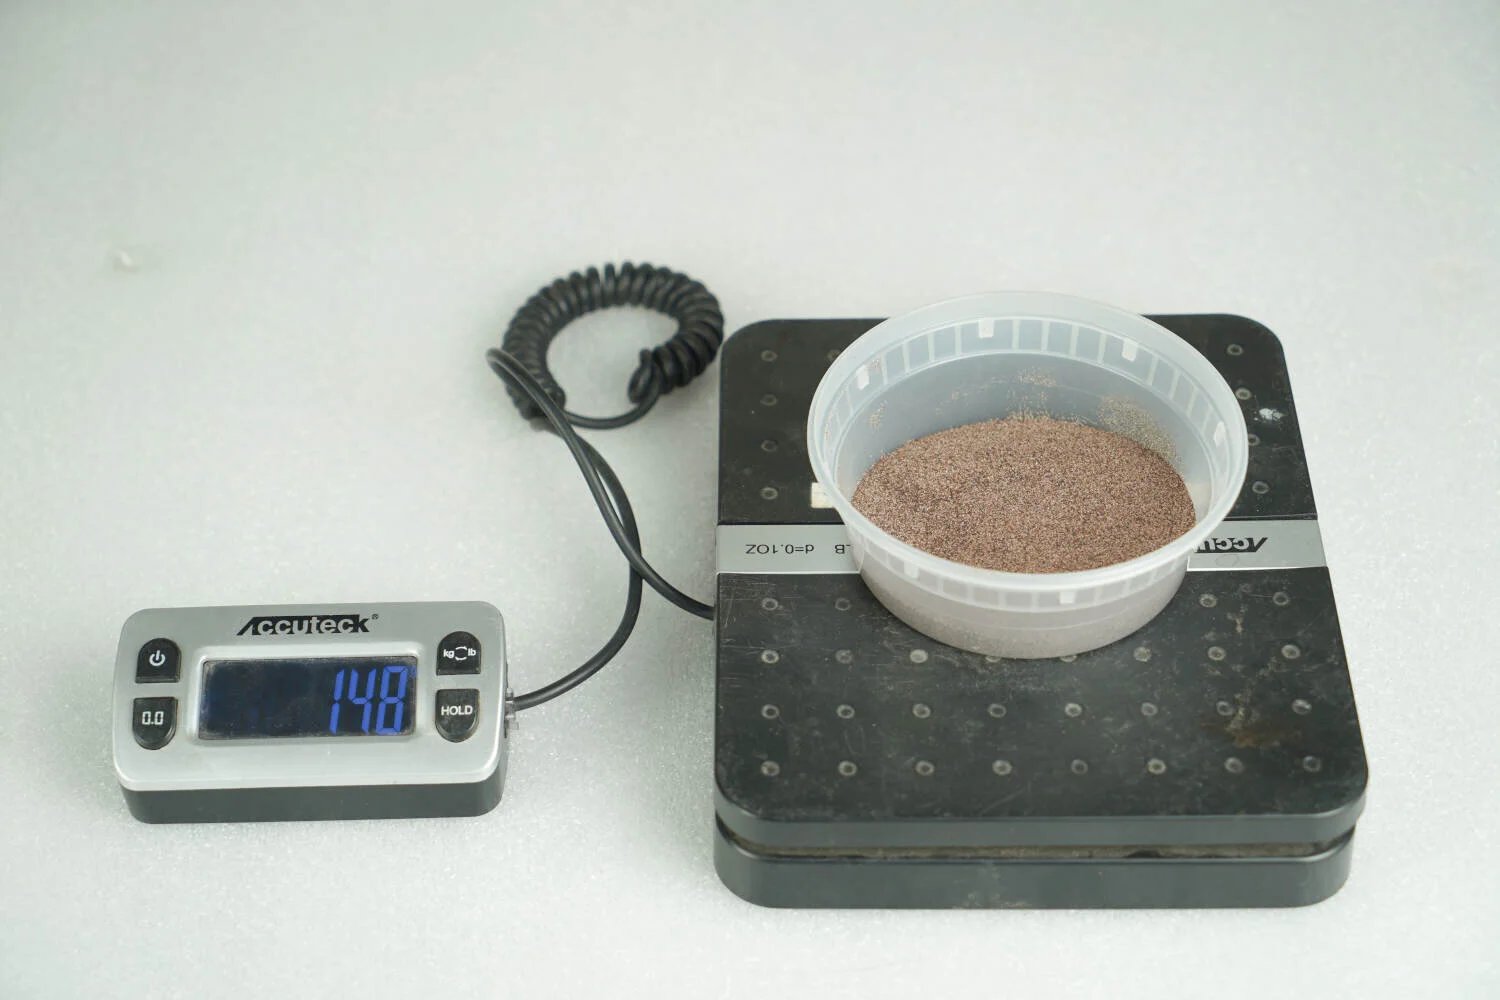
Scale w/ accuracy of +/- 0.5g (+/-0.02oz) and capacity of at least 200g (7 oz)
Cup with a volume of 250ml (8oz)
“SH” Abrasive Orifice (Engraved with "SH")
Procedure: Checking Abrasive Flow Rate
Open Abrasive drawer
If the Abrasive Hopper is empty, please add a small amount of Abrasive (>1lb / 0.5 kg.).
3. Remove Abrasive Catch/Valve Slip cover.
4. Select Setup and Maintenance.
5. Select Abr. Flow Rate.


6. Place (or hold) a cup or container below the Abrasive Valve.


7. Now hit START to begin the flow of abrasive.
If the valve simply doesn’t open consistently for the full 60 seconds, see (Machine Procedures > Pinch Valve Teardown.
The timer will count while the abrasive is flowing.
8. After 1 min, the Abrasive Flow finishes. Weigh the container with the Abrasive, then subtract the weight of the container. This is the abrasive flow rate per minute.
Procedure: Installing the "SH" Orifice
9. If your flow rate is below 125 g/min and you are using the darker Barton Alltek HPA 80A, the default orifice is likely restricted by the material properties.
Remove the current abrasive orifice.
Install the orifice engraved with “SH”.
The "SH" orifice is specifically designed to bring the flow rate of darker Barton abrasive back up to the target range of 145–150 g/min.
If changing the abrasive orifice did not bring any changes in the abrasive flow rate, and the flow rate is consistently low, that means some other restriction presents. Contact customer support at support@wazer.com for assistance

10. Re-test the Rate
Perform the flow rate test again with the "SH" orifice installed. Confirm the rate has returned to the 140–150 g/min range.
11. Re-test the rate until you hit the target rate within the specified tolerance.
12. Once the target abrasive rate has been reached, replace the abrasive cover and close the Abrasive hopper.

Why this matters
Abrasive flow rate is the primary driver of cutting speed and edge quality. A drop from 145g/min to 105g/min represents a huge decrease in cutting power, which can lead to partial cuts or excessive frosting on the material surface.
Maintaining the proper abrasive flow rate is key to cutting performance and machine health.